Harry Potter Drawing Ideas
Harry Potter, the hero in the top rated book series by writer J.K. Rowling, is a notorious person that is cherished by many individuals, everything being equal. As a matter of fact, when we consider black magic and wizardry, Harry Potter is consequently the primary individual that rings a bell.
Visit the more thing of Childhood Education.
The notoriety of Harry Potter made this instructional exercise exceptionally mentioned. You requested it, so we conveyed. At long last, we have organized a bit by bit instructional exercise on the most proficient method to draw Harry Potter summed up in 9 simple and basic advances.
You can apply these means whether you need to draw a reasonable looking Harry Potter character or an enlivened one. Each step is went with fathomable outlines that act as your visual aide as you adhere to the directions. Whether you are a beginner or a specialist in drawing, we’re certain you can follow these means easily. Also, you can add your own style and make do in each step. Go ahead and blend and match tones to redo your fine art and make it interesting. Allow your creative mind to meander and release your inventiveness.
Stage 1 – Harry Potter Drawing
Beginning in your paper, draw a wide unpredictable circle to make the layout of Harry Potter’s face. Remember that the length of the circle should be moderately more extensive than its level. Then, at that point, define two bended boundaries on the two sides of the face to frame the ears.
Here is a valuable tip: to guarantee that Harry Potter’s face will be attracted the center, you can draw a level and an upward line across the paper to be utilized as reference lines.
Stage 2 – Draw Harry Potter’s Scarf
Right under the face, define two bended vertical boundaries that are almost an inch separated. This frameworks the sides of the scarf. Then, at that point, draw a somewhat up bend with both of its closures associated with the upward lines.
Since we have drawn the diagram of the scarf, now is the ideal time to draw the hanging end of the scarf to cause it to show up more reasonable. Beginning from the left half of the scarf, draw one more two equal somewhat bended vertical lines with a straight flat line interfacing the two closures. Make it a point to the scarf anyway you like! You might in fact draw examples and plans on the scarf to make it more tomfoolery!
Stage 3 – Next, Draw Harry Potter’s Jacket
On the two sides of the scarf, define two equal vertical boundaries with a straight level line interfacing the two finishes. When drawn accurately, it ought to seem to be a generally greater variant of the shape we have drawn for the hanging end of the scarf in the past step. Remember to do this step on both the left and right half of the scarf. This diagrams the forward portion of Harry Potter’s jacket.
Stage 4 – Then, Draw Harry Potter’s Top
Under the scarf in the middle of between the kickoff of the coat, draw two wide “V” lines with one on top of the other. The line at the top ought to be somewhat thicker than the one at the base. This blueprints the neckline of the shirt.
A short time later, define two equal level boundaries beneath the “V” lines we have drawn a few seconds ago. Like the “V” line, the line at the top should be thicker than the one at the base. This diagrams the trim of the shirt.
Stage 5 – Complete Harry Potter’s Outfit
Since we have wrapped up drawing the top, now is the ideal time to draw the bottoms and the shoes to finish the look! Beneath the top, draw a couple of pants by drawing a shape that is like the way in which we have attracted the coat the third step. The trouser leg should be somewhat separated from one another. Then, right under each trouser leg, draw a sideways oval shape to frame the shoes.
Stage 6 – Append Arms to Harry Potter’s Body
On the two sides of the body, draw the long sleeves of the coat with a couple of hands somewhat noticeable toward the finish of every sleeve. As you can find in this outline, one hand is still on the body while the other one is raised. You can select to follow this outline or position the arms anyway you like. One way or the other, we’re certain your Harry Potter drawing will look similarly as astounding!
Stage 7 – Draw Harry Potter’s Hair and Wand
Draw the hair directly over the head. Then, draw pointed bunches of hair close to the brow. Presently, we should continue on toward drawing the supernatural wand. From the clench hand of the lifted hand, attract a sharp stick to make the wand. It ought to look like Harry Potter is holding the wand as his hands are raised.
Stage 8 – Put Harry Potter’s Famous Glasses On
Underneath the eyebrows, draw two monstrous wonderful circles. Then, at that point, interface the two circles together by defining an in the middle of between the focal point. Remember to make the blueprint of the circle thicker to cause the eyeglasses to show up more reasonable.
Stage 9 – Draw Harry Potter’s Eyes
Inside the glasses we have attracted the past step, draw an upstanding oval shape inside each glass focal point to make the eyes. A short time later, conceal within the eyes while leaving out a little dab unshaded to make a “sparkling eyes” impact.
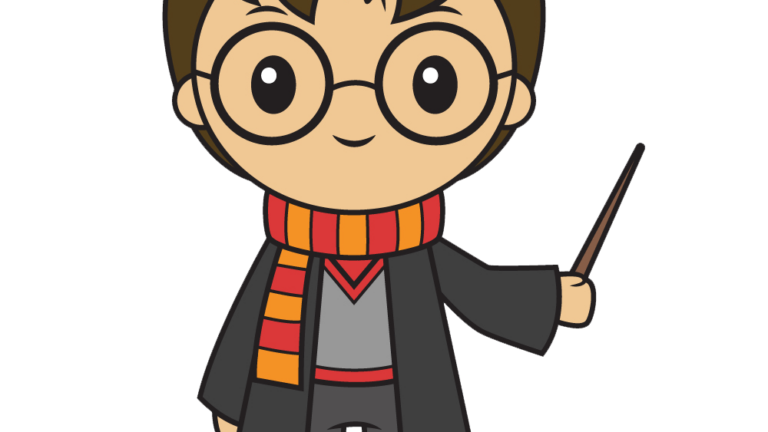
What’s more, that’s basically it; you have effectively drawn the amazing person Harry Potter. Presently, all it’s missing is a sprinkle of distinctive and lively varieties to finish your craftsmanship at long last! At last, here is the most astonishing part — filling in the varieties for your marvelous drawing!